


GC G-CEM LINKACE - transluscent
OverView
Se...For fast ORDERING experience Visit our new site  www.medicabasket.com
NOTE: Due to volatility in dental market, Price and stock shown here are tentative and needed approval of supplier, Although we update frequently. Our Team will your order soon.
COD is not available now.
Call/ WhatsApp on +91-9313922999 / +91-9810283698

- Information
-
Dental Brands
- 3M Espe
- 3M Unitek
- A.J. Wilcock
- Agfa
- American Orthodontics
- Ammdent
- Anabond
- Angelus
- API Ashoosons
- API Instruments
- Apple Dental
- Being Foshan
- Bestodent
- Bien Air
- BIOLASE
- Blossom
- Bombay Dental
- Capri
- Captain Ortho
- Cerkamed
- Colgate
- Coltene Whaledent
- Confident
- D-Tech
- Danville
- Denext
- Dental Books
- Dental-Avenue
- Dentaurum
- Dentium
- Dentsply
- Desires ortho
- Detax Dental
- Diadent
- Dispodent
- DMG
- DPI
- Durr Dental
- Eighteeth
- Eltee Instruments
- Endoking
- Euronda S.P.A
- Fgm
- Fuji film
- G&H
- GC
- Gen-XT Implant
- Gendex
- Genoray
- Green Guava
- Hahnenkratt
- Heraeus Kulzer
- Horico
- Hu-Friedy
- ICPA
- Ids Denmed
- IMDSL Laser
- Itena
- Ivoclar Vivadent
- J Morita
- Jota
- Kalabhai
- Kavo
- Kerr
- Kodak
- Labomed
- Leone
- Libral
- Life Steriware
- Maarc
- Mani
- Marathon
- MDC
- Medicept
- Meta
- Modern ortho
- Moriz
- Navadha
- Neelkanth
- NeoEndo
- Novabone
- NSK
- Oracura
- Orateek
- Orchestrate O3D Aligner
- Ormco
- Oro
- Ortho Classic
- Ortho Organizers
- Ortho Technology
- Orthocare
- Orthosource
- Premier
- Prevest
- Prima Dental
- Pulpdent
- Pyrax Dental
- Rabbit Force Ortho
- Rejove 32Watts Aligners
- RS Dental Chair
- Ruby Dental
- Ruthinium
- Saeshin
- Samit
- Scheu
- SDI
- Septodont
- Shivam Dental
- Shofu
- SK Surgicals
- Skydent
- SS-White
- Strong
- Sun Medical
- Sure Endo
- Surgiwear
- Tokuyama
- TP Orthodontics
- Unicorn
- Unident
- Unique
- Vatech
- VDW
- VeeCare
- Vita
- Voco
- VRN
- W&H
- Waldent Equipment
- Waldent Instruments
- Waldent Material
- Woodpecker
- Zhermack
- Zoom
- Triodent
- Other brands
- Offers & Combos
- Contact Us
-
Product Category
- Composites & Restoratives
- Dental Education
-
Dental Equipment
- Air-Motor
- Apex Locators
- Autoclaves & Sterilizers
- Dental Air Compressor
- Dental Chair
- Dental Chair Accessories
- Dental Handpiece
- Dental Laser
- Dental Loupes
- Dental Surgery
- Endo Motor
- Handpiece Cartridge
- Implant Motors
- Intraoral Camera
- LED Light Cure
- Micromotors
- Microscope
- Radiology
- Suction Units
- Ultrasonic Scalers
- UV Chamber
- Dental Lab
- Endodontics
- Implantology
- Instruments And Burs
- New Clinic Setup Kits
- Oral Surgery
- Paedodontics
- Periodontics
- Prosthodontics
- Sterilization & COVID-19 Supplies
- General Dentistry
-
Ortho Store
- Arch Wires & Springs
- Bonding Adhesives
- Elastomerics
- Expansion Screws
- Headgear accessories
- Laboratory Products
- Mini TAD Screw
- Molar Bands and Tubes
- Ortho Attachments
- Photographic Accessories
- Weldable Accessories
- Braces or Brackets
- Clear Aligners
- Orthodontic Appliances
- Orthodontic IPR solutions
- Orthodontic Instruments
- Find Your Dentist
- Medica Basket
Your shopping cart is empty!
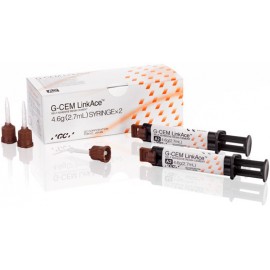
Self-Adhesive Resin luting Cement in automix delivery
Features:
- Excess cement is easily removed in one piece after only a 1-2 second tack cure.
- high flexural and bond strengths prevent loss of retention even when a classical preparation is not possible.
- HEMA-free and shows very low water uptake, delivering exceptional colour stability.
Description
G-CEM LinkAce, the next generation self-adhesive resin cement from GC, builds on this expertise with new high technology including an innovative initiator system for fast and safe polymerization. The result is a material that offers exceptional physical properties and bond strength while keeping the same ease-of-use and lack of post-operative sensitivity seen with G-CEM Automix.
| Component | % |
| Fluoro-alumino-silicate glass | 60-70 |
| Urethanedimethacrylate | 12-17 |
| Dimethacrylate | 12-17 |
| Silicon dioxide | 3-8 |
| Initiator | Trace |
| Inhibitor | Trace |
| Pigment | Trace |
Indications
- Cementation of all types of all ceramic, resin and metal-based inlays, onlays, crowns and bridges.
- Cementation of metal, ceramic, fibre posts, and cast post and cores.
ADVANTAGES
- offers unsurpassed wear resistance due to its small and homogeneously distributed filler particles.
- provides for exceptionally reliable self-curing under all materials.
- contains unique phosphate monomers that chemically bond to Zirconia, for a strong and stable bond.
Key Specifications
The working time is 3 minutes 30 seconds from start of mix at 23°C (73.4°F).
Setting time: 4 minutes after removing excess material
Halogen/LED, intensity for ceramic, indirect composites and metal-based restorations: 700mW/cm2, covering wavelength: 430 to 480 nm)
(Halogen/LED, intensity for fiber post, metal ceramic, cast post and core: 700mW/cm2, covering wavelength: 430 to 480 nm). b) Let the material set for another 4 minutes.
In case of a cast post and core, let the material set for 10 minutes.
CONTRAINDICATIONS
1. Pulp capping.
2. In rare cases the product may cause sensitivity in some people. If any such reactions are experienced, discontinue the use of the product and refer to a physician.
3. This product is not indicated for filling or core build-up.
STORAGE
Store at room temperature away from heat, moisture and direct sunlight (4-25°C) (39.2-77.0°F).
Shelf life: 2 years from date of manufacture
CAUTION
1. In case of contact with oral tissue or skin, remove immediately with a sponge or cotton soaked in alcohol. Flush with water. To avoid contact, a rubber dam and/or cocoa butter can be used to isolate the operation field from the skin or oral tissue.
2. In case of contact with eyes, flush immediately with water and seek medical attention.
3. Do not use G-CEM in combination with eugenol containing materials as eugenol may hinder G-CEM from setting or bonding properly.
4. Use a protective light shield or similar protective eye wear during light curing.
5. This product is not indicated for filling or core build-up.
Packaging
1. G-CEM LinkAce syringe 4.6 g (2.7 mL) (2), GC Automix Tip Regular (15), GC Automix Tip for endo with extension tip (5)
2. GC Automix Tip Regular (20) 3. GC Automix Tip Regular (10) 4. GC Automix Tip for endo with extension tip (10
Direction to Use
A. CEMENTATION TECHNIQUE for ceramics, indirect composites and metal-based restorations
1. TOOTH PREPARATION a) Prepare tooth in usual manner. For pulp capping, use calcium hydroxide. b) Clean the prepared tooth with pumice and water. A clean surface is paramount for an optimal adhesion. c) Rinse thoroughly with water. Dry thoroughly by gently blowing with oil free air. Prepared surface should be dry. NOTE: 1. Do not use substances like H²O², EDTA and/or disinfectants as these may lower the bond strength. 2. Special care should also be taken to remove so called imaging powders very thoroughly with pumice and water.
2. RESTORATION PREPARATION Make sure that the restoration is pretreated and handled according to the manufacturer’s instructions.
3. DISPENSING a) Before dispensing the first time from a new syringe or after a long interval in between use, bleed the pastes from the syringe. b) Extrude material directly into the restoration. NOTE: The used mixing tip can be left on the syringe to serve as a storage cap until next use. For each application, place a new mixing tip.
4. CEMENTATION a) Coat the internal surface of the restoration with sufficient cement and seat immediately. The working time is 3 minutes 30 seconds from start of mix at 23°C (73.4°F). Higher temperatures will shorten the working time. NOTE: Ambient light may shorten the working time. It is recommended to diminish the intensity or turn off your operation light during the cementation procedure. b) Maintain moderate pressure until final polishing is done.
5. EXCESS CEMENT REMOVAL a) Maintain moderate pressure and make sure the restoration remains in place. b) To remove excess cement, light cure using a visible light curing unit for 1 second or allow the cement to self-cure until the excess cement feels rubbery. c) Remove excess cement with appropriate instruments, holding the restoration in position.
6. FINAL SET While maintaining moderate pressure, light cure all surfaces / margins for 20 seconds each (Halogen/LED, intensity: 700mW/cm2, covering wavelength: 430 to 480 nm). In case of the following restorations, let the material set for 4 minutes after removing excess cement. -Metal and metal coping restorations -Metal-free dark and opaque restorations -Translucent metal-free restorations greater than 2mm in thickness
7. FINAL POLISHING If needed, finish and polish margins with appropriate instruments.
B. CEMENTATION TECHNIQUE for metal, ceramic, fiber posts, and cast post and cores
1. TOOTH PREPARATION Prepare the post space according to manufacturer’s instructions. The post space should be cleaned, rinsed and dried thoroughly using paper points. The post space should be dry. NOTE: a) Sodium hypochlorite solution is recommended to use for the chemical cleaning of the post space. b) Do not use H²O² and/or EDTA to chemically clean the post space as these products may lower the bond strength.
2. POST PREPARATION Make sure that the post is pretreated and handled according to the manufacturer’s instructions.
3. DISPENSING & CEMENTATION a) Before dispensing the first time from a new syringe or after a long interval in between use, bleed the pastes from the syringe. b) Attach a GC Automix Tip for endo. For details, see A 3b) above. c) Apply the extension tip to the mixing tip. d) Extrude material directly into the post space. e) Insert the post immediately into the post space within 1 minute after cement application. NOTE: 1) The oral temperature accelerates the setting reaction of the cement. 2) Ambient light may shorten the working time. It is recommended to diminish the intensity or turn off your operation light during the cementation procedure. 3) Keep the tip immersed in the cement while dispensing to avoid trapping air. 4) DO NOT use lentulo spirals to place the cement in the post space as this may shorten the working time. f) Maintain moderate pressure.
4. EXCESS CEMENT REMOVAL Continue to maintain moderate pressure making sure the post remains in place, and remove excess cement with appropriate instruments. In case of a cast post and core, tack cure all surfaces for 1 second each with a visible light curing unit.
5. FINAL SET a) While maintaining moderate pressure, light cure all surfaces/margins for 20 seconds each (Halogen/LED, intensity: 700mW/cm2, covering wavelength: 430 to 480 nm). b) Let the material set for another 4 minutes. In case of a cast post and core, let the material set for 10 minutes.