


Dmg Luxabite
OverView
Bite Registration M...For fast ORDERING experience Visit our new site  www.medicabasket.com
NOTE: Due to volatility in dental market, Price and stock shown here are tentative and needed approval of supplier, Although we update frequently. Our Team will your order soon.
COD is not available now.
Call/ WhatsApp on +91-9313922999 / +91-9810283698

- Information
-
Dental Brands
- 3M Espe
- 3M Unitek
- A.J. Wilcock
- Agfa
- American Orthodontics
- Ammdent
- Anabond
- Angelus
- API Ashoosons
- API Instruments
- Apple Dental
- Being Foshan
- Bestodent
- Bien Air
- BIOLASE
- Blossom
- Bombay Dental
- Capri
- Captain Ortho
- Cerkamed
- Colgate
- Coltene Whaledent
- Confident
- D-Tech
- Danville
- Denext
- Dental Books
- Dental-Avenue
- Dentaurum
- Dentium
- Dentsply
- Desires ortho
- Detax Dental
- Diadent
- Dispodent
- DMG
- DPI
- Durr Dental
- Eighteeth
- Eltee Instruments
- Endoking
- Euronda S.P.A
- Fgm
- Fuji film
- G&H
- GC
- Gen-XT Implant
- Gendex
- Genoray
- Green Guava
- Hahnenkratt
- Heraeus Kulzer
- Horico
- Hu-Friedy
- ICPA
- Ids Denmed
- IMDSL Laser
- Itena
- Ivoclar Vivadent
- J Morita
- Jota
- Kalabhai
- Kavo
- Kerr
- Kodak
- Labomed
- Leone
- Libral
- Life Steriware
- Maarc
- Mani
- Marathon
- MDC
- Medicept
- Meta
- Modern ortho
- Moriz
- Navadha
- Neelkanth
- NeoEndo
- Novabone
- NSK
- Oracura
- Orateek
- Orchestrate O3D Aligner
- Ormco
- Oro
- Ortho Classic
- Ortho Organizers
- Ortho Technology
- Orthocare
- Orthosource
- Premier
- Prevest
- Prima Dental
- Pulpdent
- Pyrax Dental
- Rabbit Force Ortho
- Rejove 32Watts Aligners
- RS Dental Chair
- Ruby Dental
- Ruthinium
- Saeshin
- Samit
- Scheu
- SDI
- Septodont
- Shivam Dental
- Shofu
- SK Surgicals
- Skydent
- SS-White
- Strong
- Sun Medical
- Sure Endo
- Surgiwear
- Tokuyama
- TP Orthodontics
- Unicorn
- Unident
- Unique
- Vatech
- VDW
- VeeCare
- Vita
- Voco
- VRN
- W&H
- Waldent Equipment
- Waldent Instruments
- Waldent Material
- Woodpecker
- Zhermack
- Zoom
- Triodent
- Other brands
- Offers & Combos
- Contact Us
-
Product Category
- Composites & Restoratives
- Dental Education
-
Dental Equipment
- Air-Motor
- Apex Locators
- Autoclaves & Sterilizers
- Dental Air Compressor
- Dental Chair
- Dental Chair Accessories
- Dental Handpiece
- Dental Laser
- Dental Loupes
- Dental Surgery
- Endo Motor
- Handpiece Cartridge
- Implant Motors
- Intraoral Camera
- LED Light Cure
- Micromotors
- Microscope
- Radiology
- Suction Units
- Ultrasonic Scalers
- UV Chamber
- Dental Lab
- Endodontics
- Implantology
- Instruments And Burs
- New Clinic Setup Kits
- Oral Surgery
- Paedodontics
- Periodontics
- Prosthodontics
- Sterilization & COVID-19 Supplies
- General Dentistry
-
Ortho Store
- Arch Wires & Springs
- Bonding Adhesives
- Elastomerics
- Expansion Screws
- Headgear accessories
- Laboratory Products
- Mini TAD Screw
- Molar Bands and Tubes
- Ortho Attachments
- Photographic Accessories
- Weldable Accessories
- Braces or Brackets
- Clear Aligners
- Orthodontic Appliances
- Orthodontic IPR solutions
- Orthodontic Instruments
- Find Your Dentist
- Medica Basket
Your shopping cart is empty!
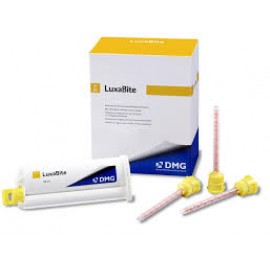
Bite Registration Material
LuxaBite is a bis-acrylic based self-mixing bite registration material. It offers barely discernible resistance to the jaw occlusion of the patient. As such, a reliable bite registration of the occlusion is guaranteed. A detailed recording of the occlusal relief and the high end hardness simplify the precise positioning of working and counter-bite models.
COMPOSITION:
Glass filler material in a matrix of multifunctional methacrylates. Free from methyl methacrylate and peroxides
INDICATIONS:
Bite registration, fixation of impression posts or transfer caps for implant impressions
ADVANTAGES:
Hard, harder, LuxaBite!
The hardest among all bite registration materials is based on the innovative bisacrylate formula. Its thixotropic properties prevent the material from running into interdental spaces, and its superior final hardness (Shore D-69, or Barcol 25) eliminates compression or flexing when mounted to facilitate precise bite registrations.
Even implantologists appreciate the material’s advantages and use LuxaBite for the fixation of multiple impression posts to obtain torsion-free implant impressions.
FEATURES:
The triumph of rigidity.
- One of the hardest VPS-based bite registration materials
- Superior break restistance
- Fresh fruity orange scent
- Minimal bite resistance
- Fast-curing
KEY SPECIFICATIONS :
TECHNICAL DATA:
- Total working time : 0:45 min from starting mixing
- Elastic phase : 2:00 to 2:30 min from starting mixing
- Final curing : 4:00 min after removal
- Barcol hardness : 25 after 1 h
DIRECTIONS TO USE :
Using the Automix cartridge
Insert cartridge
1. Push up the lever at the back of the Automix-Dispenser and pull back the slide completely
2. Lift up the plastic lever , insert the cartridge and lock it using the plastic lever Note: Make sure that the notches on the cartridge line up with those on the AutomixDispenser.
Attach mixing tip
1. Remove the cartridge cap or used mixing tip by turning it 90° counterclockwise, and discard it
2. Attach a new mixing tip Note: In order to attain an optimum mixing result, DMG recommends the use of the mixing tips available from DMG. All mixing tips are also available as refill packs. Note: Make sure that the notches on the mixing tip line up with those on the cartridge
3. Turn the mixing tip clockwise 90° to lock it.
Applying the material
When using a cartridge for the first time, squeeze out a pea-sized amount of material and discard it.
The material is mixed in the mixing tip by pulling the triggerof the Automix-Dispenser and it is then applied directly.
Note: After the application, leave the used mixing tip on the cartridge to cap unused material!
Remove cartridge
1. Push up the lever at the back of the Automix-Dispenser and pull back the slide completely
2. Lift up the plastic lever and remove the cartridge.
Recommended use Habitual bite registration
1. Lightly isolate any existing acrylic structures with Vaseline or a similar separating agent. Block out any existing bridge pontics using a suitable substance, e.g. wax
2. Apply LuxaBite to the dry dental row. When doing so the length of the material may be 3 to 4 cm. Application should take place to prepared areas first
3. Allow patient to adopt the desired occlusion
4. In order to ensure the complete bite registration of the occlusal surfaces, apply additional material under the buccal cusps of the maxillary teeth
5. Once the material has cured for 45 to 60 s, have the patient open their bite slightly and then close it once more. This will ease the subsequent removal of the register. 6. Once the material has cured for a further 90 s, remove the material with gloved fingers or using a suitable instrument
7. In order to avoid positioning errors, reduce the register to the occlusal contact surfaces. To do so use a suitable instrument, e.g. an acrylic bur
8. Articulate models with the aid of the bite register.
Central bite registration using anterior tooth jig
1. Use a suitable material, e.g. composite or silicone, for the vertical opening. When doing so, position the material at the anterior mandible and have the patient assume the desired occlusion. The dental rows are not fully closed, in order that space remains for the application of the bite registration material
2. The procedure now continues as described under points 2 to 8 for habitual bite registration.
Disinfection of the bite registration
The bite registration can be disinfected using standard disinfectant solutions. The use of products containing alcohol is recommended because these additionally remove the oxygen inhibition layer.
PACKAGING:
- 1 x 50 ml Cartridge (Dispensing Gun & Tips Compatibility :- 1:10)
- 15 x Automix-Tips